
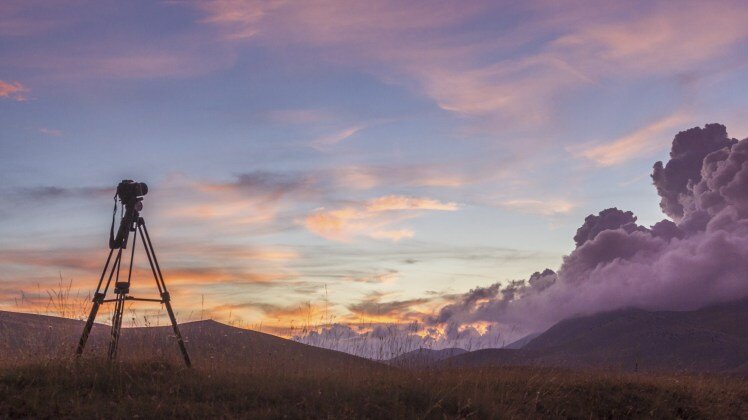
An Astrophotography Kit – The Basics

Intro:
So you want to take pictures of the night sky?
Normally, I would tell you that to begin all you need to do is grab your camera, put it in manual mode, and start taking pictures. However, astrophotography is a unique beast and there are a few more recommended pieces of equipment that will make taking pictures of the night sky a much more pleasurable experience.
If you’re a photographer already, you likely have most of this in your bag. This list for me is the bare minimum list of essentials. I take these things with me wherever I go. Unless, of course, I forget to repack my bag, only to remember half way to my destination!
The Must Have’s:
1: Digital SLR Camera:

Most people that are serious about photography already own a DSLR camera. Aside from lenses, this will be the most expensive piece of equipment you will need. There are many good cameras out there and while I shoot with both a Canon and a Sony cameras, most of the major brands are excellent choices. A few things to look for in a camera, if you do not already own one or if you are looking to upgrade:
Size does matter:The sensor size of your camera plays a critical role in your photography. It is the eye of your camera after all. In astrophotography, where light sources are usually scarce, this becomes even more important as the larger the sensor the more light your camera is able to collect. Full frame cameras are typically the gold standard when it comes to astrophotography. A full frame sensor is equivalentto 35mm film cameras and will nearly always out preform a crop sensor (APS-C) or a Micro Four Thirds (MFT) camera in low light conditions.
Full frame cameras can have their down sides. They are typically heavier and more expensive than their counterparts. So while a full frame is an excellent choice, you need to balance the pros and cons of each and choose the camera that best fits your needs.
ISO:The ISO setting on your camera changes the sensitivity of your camera’s ability to capture light. The lower the ISO, the less sensitive your sensor is and the higher the ISO, the more sensitive your sensor is to light. Now this has some downsides as well. The higher the ISO, the more noise is introduced into your image. Just because your camera can shoot at a higher ISO doesn’t necessarily mean you should. Not all cameras are created equal!
Noise:Noise in an image is a distortion of sorts. It occurs when you raise your ISO to compensate for the low light conditions you are shooting in. Noise is displayed as random variations of light or color information in an image. Noise is similar to graininess in the film world. It isn’t necessarily pleasing to the eye and it can take away from the sharpness of your image. Higher noise levels can be battled in a few different ways. The most effective way being to shoot at a higher aperture and with a lower ISO setting.
So what is the best camera out there for astrophotography? Well that really depends on you. Ask yourself what you are going to use that camera for and how much money you’re willing to invest into it. I do have a few recommendations below all based on my experience and preferences.
Full Frame & Mirrorless Recommendations:
My Gear:
All of the cameras above are professional grade cameras which are very capable of delivering exceptional results for astrophotography and frankly anything else you want to shoot. You can’t go wrong with any of them. It is possible to get great results with lower grade DSLRs if that’s what you have. I recommend you use it and learn it before upgrading.
If you’re looking for something with a lower price point, look for a good, used body. A lot of my gear has been purchased used and I have been very happy with it. If you’re unable to find something in your price point, use what you have or grab a crop sensor camera that is in your price range. Most crop sensor cameras today are very capable. If you are not printing large images, a crop sensor just may fit the bill while you are learning.
One last piece of advice on your camera. Whichever camera you head out into the field with, make sure you know it. You should know it so well that you can operate it in a dark room without pulling out the manual. The last thing you want is to be out there in the field, ready to shoot, trying to remember what setting that was, how did you get to that menu, etc. Create a cheat sheet if needed. Being out in the dark, possibly without cellphone coverage, can be a frustrating and unfruitful adventure if you do not know the ins and outs of your camera!
2: Lenses

When shooting the night sky, you usually have a very large canvas to capture. One of the easiest ways to capture that is with a very wide lens! I typically shoot between 16mm and 24mm. This provides a good field of view but limits the distortion you typically see with a wider fisheye lens. I do like to capture the night sky with longer focal length of 35mm plus. This does add additional complexity, as your exposure time will need to be much shorter or you will need to add a star tracker into your configuration to limit or remove the movement of the night sky.
What makes a good astrophotography lens? Basically you want it as fast (aperture) and as wide (focal length) as possible. There are certainly other things that impact lens selections, including the quality of the glass, but this is a good starting point.
What is a fast lens? I recommend a lens with at least a f/2.8 aperture. This wide open aperture allows more light to reach the sensor thus allowing shorter exposure time.
Lens Recommendations:
Rokinon lenses offer a balance of quality and affordability, the 24mm has been my go to for quite a while. Additionally, Canon, Nikon and Sony all offer good quality professional lenses that work well for astrophotography. Outside of the main camera manufactures, Tamron and Sigma offer great quality at typically a lower price point than the major camera manufacturers. As of late, the Sigma Art series lenses have had amazing results. I have tested a few and been extremely satisfied with the results. I will be adding some of these to my bag soon, but like the cameras above they are an investment.
My Gear:
3: Tripod and Head
A tripod is the third most essential component for night sky photography. Since you are taking long exposures you do not want any additional movement. My biggest recommendation is to invest in a sturdy, solid tripod and make sure that you do not get too close to the load capacity. Outside of that it’s really up to you. I use aluminum tripods, my primary is heavy and solid. It doesn’t budge in the wind and it can hold a substantial load. I have two secondary tripods that are lighter aluminum. They still work well but are easy to move if you bump into them at all. Obviously, if you are hiking or walking longer distances to get your shots, the weight becomes a factor. Carbon fiber tripods are also very sturdy and light, but those come with a hefty price tag.
The tripod head is almost as important as the tripod itself, but again not all are created equal! There are various types of heads but I prefer a ball head with a rotating base. The ball head gives you a wide range of motion and the rotating base allows you to easily capture panoramic images. I also prefer the arca-swiss plates, by placing an L bracket on the camera body allowing you to very quickly and easily change the camera from a landscape to portrait orientation. Be careful though with the less expensive ball heads, they typically have low weight capabilities. By putting a heavy camera and lens on one of them, they could slip and move during your exposure.
Tripod Recommendations:
Tripod recommendations area little simpler, there are many great setups out there in a wide range of prices to accommodate. I’ll give you a few manufacturer recommendations below but the rest is up to your needs:
My Gear:
4: Remote or Intervalometer
An intervalometer is an important component for a few reasons. First, it allows you to trigger the camera without touching it, which reduces camera shake. Secondly, It also allows you to take exposures longer than the maximum allowed by the camera. Those typically max out at about 30 seconds. Lastly, it allows you to take images at specific intervals until you tell it to stop. This is helpful for image stacking and star trails. There is nothing more frustrating than to have to press the shutter button several hundred times to capture that star trail!
Intervalometer Recommendations:
Intervalometer recommendations are pretty straight forward as well, for basic functionality, something that works with your camera! Some are very simplistic and others are more complex, just depends on what you are wanting to get out of it. I personally use a MIOPS trigger, this is used as an intervalometer, and lightning trigger primarily but it has many other functions as well.
My Gear:
6: Optional Equipment
Filters:
Filters are not necessary for astrophotography but they sometimes can come in handy! There are a few lens filters that are suggested to I carry for astrophotography, the most beneficial being the natural night filter and a neutral density filter. A natural night filter will can help to reduce light pollution. The neutral density filter, especially graduated filters can help fight bright light sources impacting your skies allowing for longer exposure than would normally be feasible.
Recommended Filters & My Gear:
Smartphone:
A phone is important for a number of reasons. First and foremost, in the case of an emergency you may be able to make a phone call depending on your location*. Secondly, you will have a map and compass in the event you get lost. There are also several good star finding and planningapps available for both Android and Apple phones. You can also use it as a timer in the event there is an issue with your intervalometer.
*In order to get away from the city lights, you may have to go some distance away from civilization. While your phone may work to make a call, you always want to let someone know your plans. Where you plan on going, how long you plan to be gone, and your route are important pieces of information necessary in the event of an emergency.
7: Lastly, Be Prepared:
The most important thing to remember is to be aware of your situation and surrounding. Here in the Arizona desert, especially in the summer Monsoon season, your surroundings can become unsafe very quickly. Washes are known to flood, even though it may not be raining directly around you. Desert wildlife is another concern. You want to make sure you are paying attention to where you are stepping, placing your hands, and setting up your equipment. Personally, I have almost stepped on a rattlesnake crossing my path and had I not had a flashlight, it would have been a different story.
Make sure you carry extra water, warm or extra clothes, and a good set of hiking boots. Also, make sure that your phone is charged and you have a backup power source like a car charger or battery.
Well That’s a Wrap
Well there you have it! All you need to hit the ground running with Astrophotography!
What do you think? Is there any gear that’s apart of your basic kit that I didn’t include? Share with me below!